This Pumpkin Spice White Russian is a great spin on a classic cocktail for fall! A splash of pumpkin spice creamer and a dash of pumpkin pie spice blend harmoniously with vodka and Kahlua.

…
Specializing in Brunch, Desserts and Cocktails
This Pumpkin Spice White Russian is a great spin on a classic cocktail for fall! A splash of pumpkin spice creamer and a dash of pumpkin pie spice blend harmoniously with vodka and Kahlua.
…
This Apple Buttermilk Brunch Cake is so decadent and can be served for breakfast or dessert. It gets made with a plethora of fresh, Granny Smith Apples and served warm with a buttermilk glaze topping.
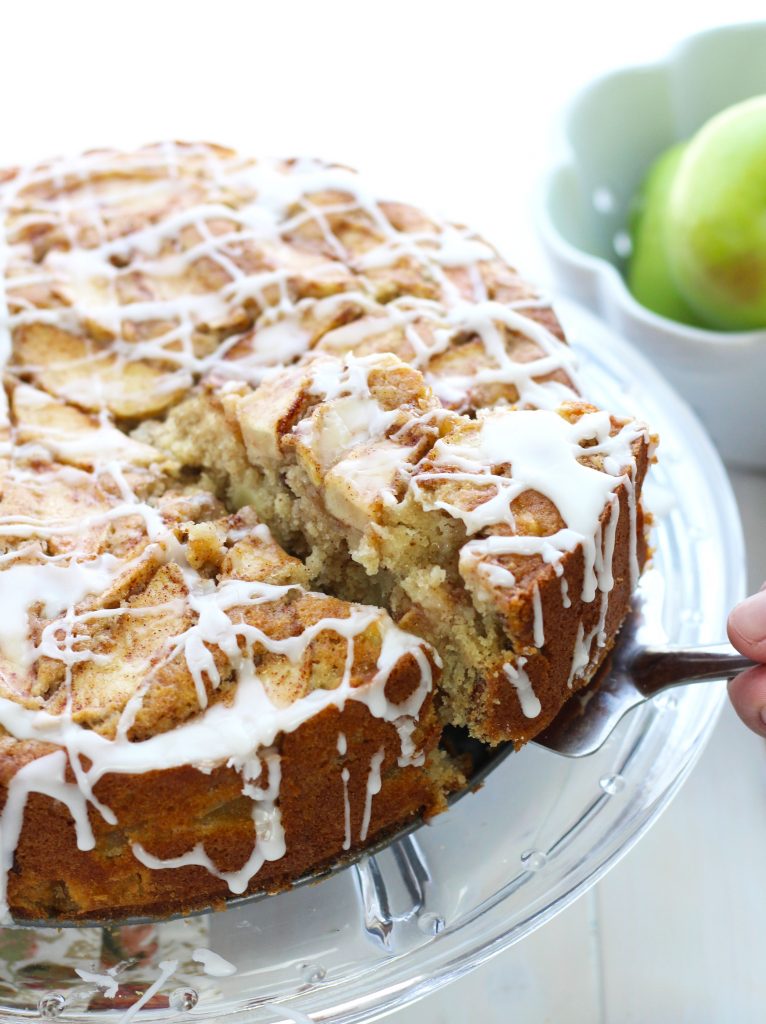
Words just can’t express how good this cake really is. I usually have to make a few tweaks after experimenting with a new recipe, but this came out heavenly on the first go. The cake has 2 Granny Smith apples in the middle and gets topped with a layer of sliced apples tossed in cinnamon and sugar. I amped up the apple flavor and moisture by adding 1/3 c. of applesauce to the mix as well. You just can’t go wrong with plenty of apples and cinnamon!

I’ve been really trying to add step-by-step photos to my posts, but time was not on my side today. My kids really want to go to Eckert’s Farm to pick apples and ride ponies. They had such a great time there last year, but I really wish this weather would cool down already. Hopefully, I come back with more great apples to make another Apple Buttermilk Brunch Cake.

This recipe is perfect for hosting a brunch this fall or Thanksgiving. It is the perfect accompaniment to a great, overnight egg casserole. Just add a fruit salad and a great mimosa or bellini to the mix and you’re winning big in life. There is just no better meal than a perfectly executed brunch, right friends?
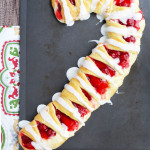
If you love this Apple Buttermilk Brunch Cake, check out some of my other favorite desserts including the popular Candy Cane Breakfast Pastry!


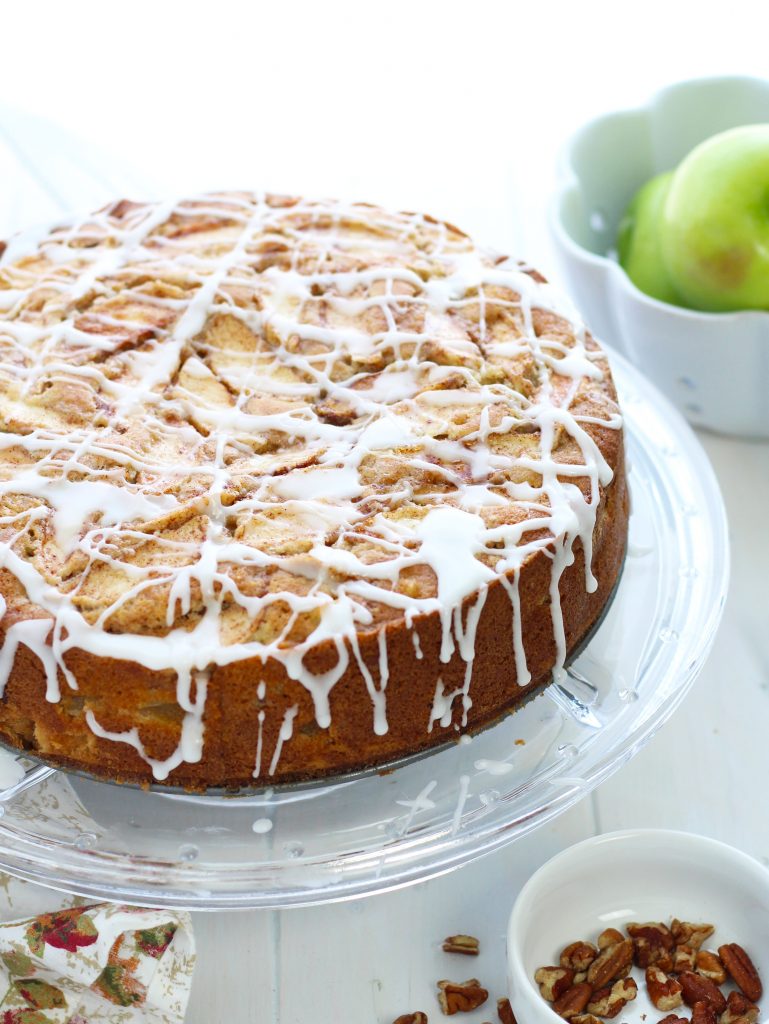

This Apple Buttermilk Brunch Cake has plenty of fresh, Granny Smith apples and a buttermilk glaze topping.
Preheat your oven to 325 degrees.
Grease and flour a 10 inch spring form pan.
In a bowl; combine the flour, baking powder, baking soda, cinnamon, nutmeg and salt.
In a separate mixing bowl; cream together the softened butter, vanilla and sugar.
Add the eggs one at a time and beat until combined.
Pour in the buttermilk and applesauce; beat until combined.
Slowly, add the flour mixture and beat until combined.
Stir in the cubed apples and pecans.
Add mixture to the prepared spring form pan.
In a small bowl; mix together the sliced apples, sugar and cinnamon.
Add the sliced apples to the top of the cake mixture.
Bake for around 1 hour and 15 minutes or until cooked through.
Allow the cake to cool for at least 10 minutes before removing the side of the pan. Prepare the glaze mixture.
Whisk together the powdered sugar and 1/4 c. of buttermilk. Add additional buttermilk as needed if mixture is too thick.
Drizzle the glaze over the top of the cake with a spoon. Serve while the cake is still warm for best results.
This scrumptious, Pumpkin Pecan Cheesecake will make a great addition to any holiday entertaining menu. The baked, pecan topping adds the perfect bit of crispiness to the smooth texture of the pumpkin spice flavored cheesecake.

This is legitimately, the best pumpkin dessert I’ve ever made or had. I’m not a huge pumpkin pie fan unless, it is smothered with a plethora of whipped cream. The texture and taste just don’t quite do it for me. Rejoice, a great pumpkin cheesecake recipe has just found its way to my arsenal of must-make holiday desserts.

Cheesecakes are a fickle creatures indeed. To bathe or not to bathe, that is the question. In this case, not to bathe. The beauty of the pecan topping is that crack doesn’t kill. You are seeing round 2 of experimentation gone right with this particular recipe. My initial attempt tasted delicious, but lacked the necessary density to hold the weight of the pecan topping without a cavernous center. I headed back to test mode and added a bit of flour and took care not to over-beat the eggs.

This dreamy recipe is creamy, but not too creamy. Basically, this Pumpkin Pecan Cheesecake has the perfect texture in my book. I don’t want to feel like I’m eating a block of cream cheese or a piece of sponge cake if you know what I mean.

Ah yes, there have been numerous cheesecake failures in my various attempts throughout the years. Here are a few tips that I’ve picked up along the way:


This Pumpkin Pecan Cheesecake has a crispy, baked pecan topping that pairs perfectly with the creamy texture of the pumpkin spice flavored cheesecake.
Preheat the oven to 325 degrees. Prepare the crust by combining the graham cracker crumbs, sugar and cinnamon. Stir in the melted butter. Firmly press crust into the bottom and up the sides of a 9 inch spring-form pan. Bake the crust for 6 minutes and remove from the oven.
Beat the cream cheese until fluffy; beat in sugars, vanilla and pumpkin pie spice.
Add the eggs 1 at a time; lightly beat until just combined. Lightly beat in the pumpkin and then, the flour. Don't over-beat!
Pour the cheese mixture into the prepared crust. Bake for 1 hour and 15 minutes. Begin preparing pecan topping around 10 minutes before timer goes off.
Prepare the topping by combining the pecans, brown sugar and butter. Sprinkle the mixture over the top of the cheesecake. Return the cheesecake to the oven and bake for an additional 15 minutes.
Turn off the oven and leave the cheesecake in with the door closed for an additional 30 minutes. Remove from the oven and allow to cool. Cover cheesecake and refrigerate in the pan overnight.
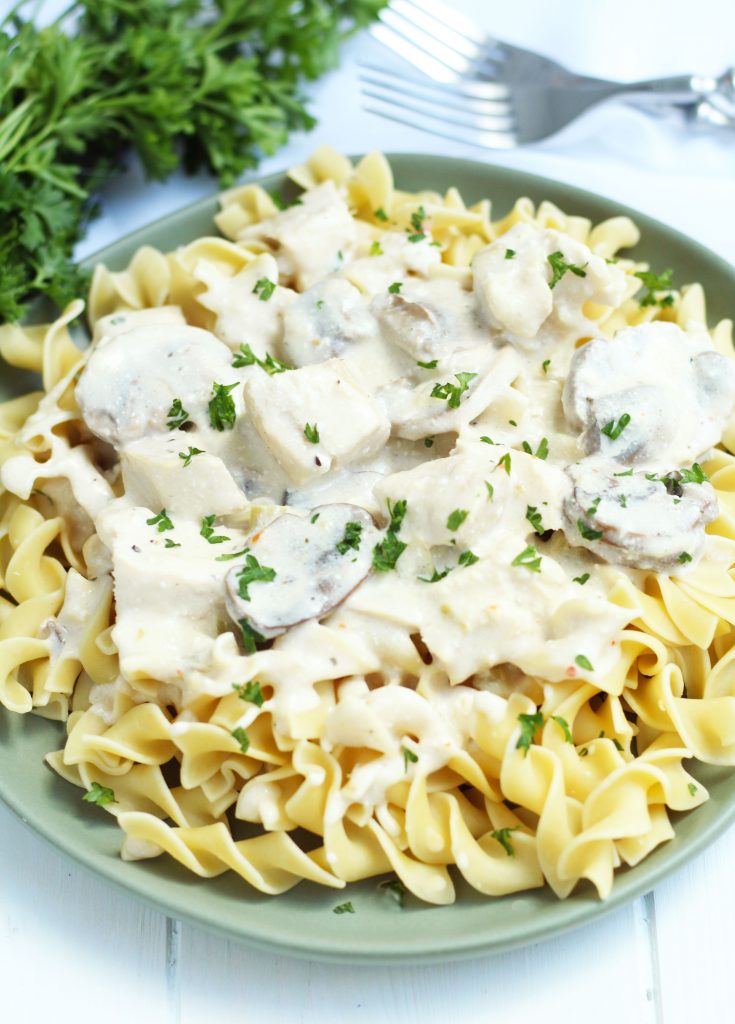
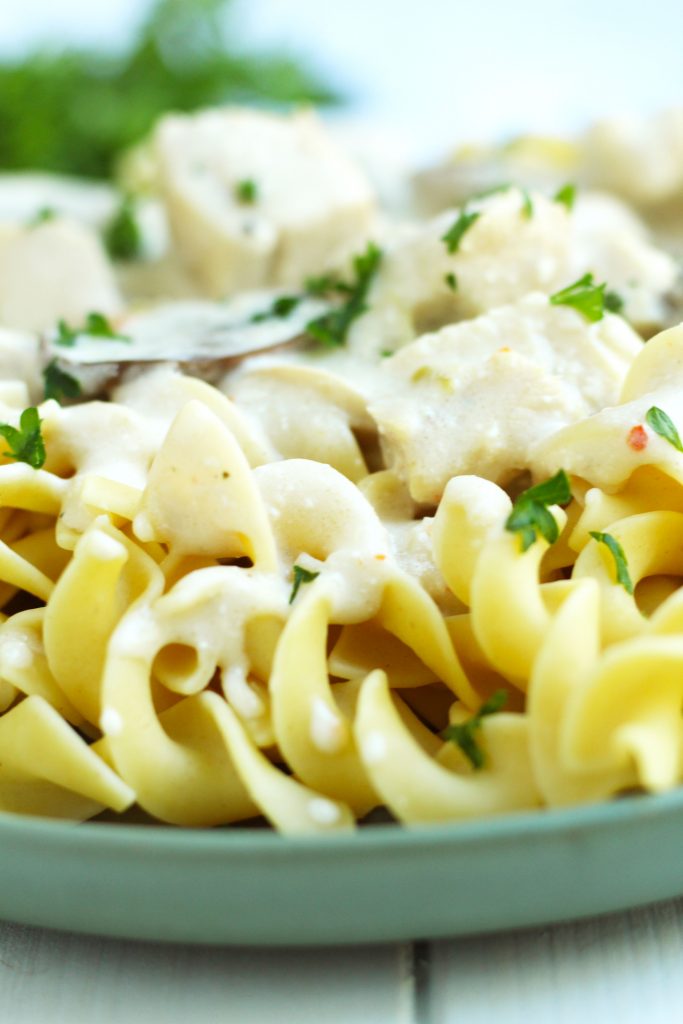
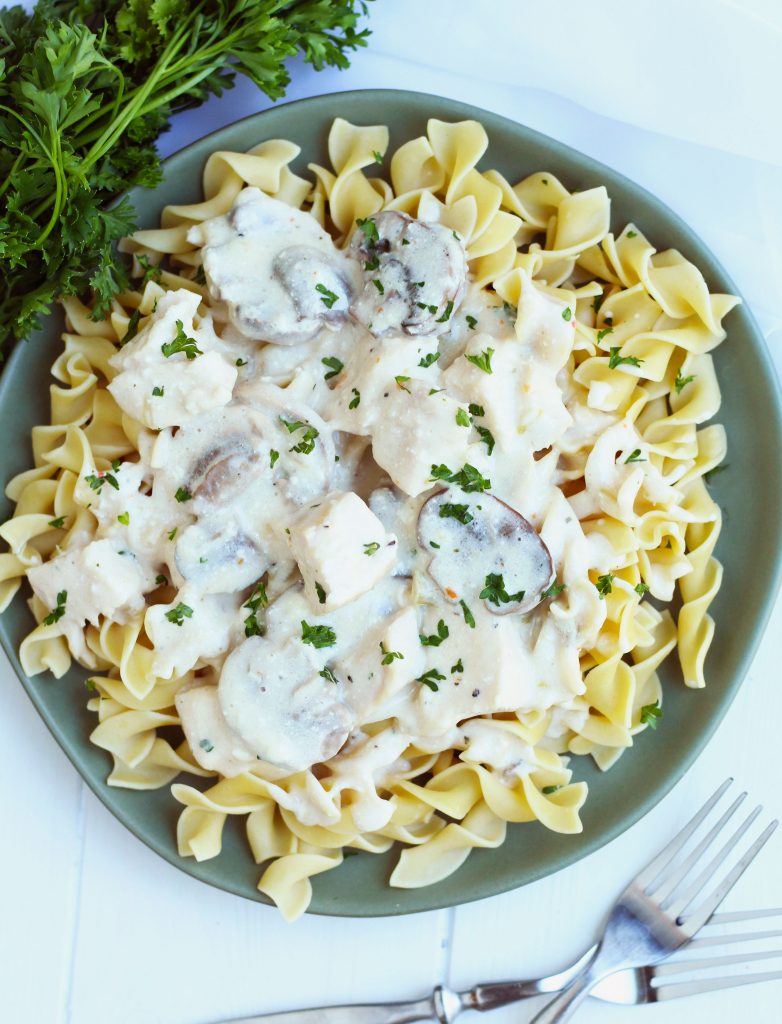
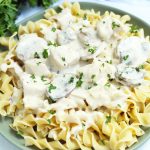
This Crockpot Chicken Stroganoff is the perfect, easy weeknight meal. Italian dressing seasoning adds plenty of flavor to this creamy, chicken mixture that gets served over a bed of egg noodles or rice.
I love to make crockpot recipes during the week or for easy entertaining. Who wants to spend all their time cooking when people are over? I want to have fun too dammit! That’s why I love a good Sangria or bucket of Whiskey Sour Slushes to get things started. This stroganoff is packed with plenty of flavor and has the perfect, creamy texture that doesn’t taste like it was made in a crockpot. A nice salad is the only side item that is really needed for this hearty meal.
The only prep that is needed for this recipe is cutting up the mushrooms. I use crimini mushrooms and slice them pretty thinly. Spray the bottom and sides of the crockpot with nonstick cooking spray before layering. The bottom layer consists of cubed butter and mushrooms.

Top the mushrooms with chicken breasts. I use 4 or 5 small chicken breasts or about 1 lb. Ensure that you season the chicken breasts with salt and pepper.
![]()
The chicken gets topped with the cream of mushroom, cream cheese, sour cream and Italian dressing seasoning. Cover and cook on low heat for around 6 hours or on high for around 4 hours. Cooking times may vary based on your crockpot. Ensure the chicken’s internal temperature reaches 165° Fahrenheit (75° Celsius). For best results, stir around every 2 hours to avoid the sauce burning.

Alternatively, you can lighten things up by using reduced fat sour cream and cream cheese. I also, like to serve it with whole wheat egg noodles or zoodles. Crockpot Chicken Stroganoff makes great leftovers as well. Unfortunately, my brother/food bandit confiscates any remnants found in the fridge upon placement.
MORE TO LOVE


I NEED A DRINK!


This Crockpot Chicken Stroganoff is the perfect, easy weeknight meal. Italian dressing seasoning adds plenty of flavor to this creamy, chicken mixture that gets served over a bed of egg noodles or rice.
Lightly spray bottom and sides of crockpot with nonstick cooking spray.
Add sliced mushrooms and butter cubes.

Top with chicken breasts; salt and pepper.

Add cream cheese, sour cream, cream of mushroom and Italian dressing mix.

Cover and cook on low heat for around 6 hours; or until the chicken's internal temperature reaches 165° Fahrenheit (75° Celsius). For best results, stir every 2 hours.
Remove chicken breasts from crockpot and cut into large cubes. Return chicken to crockpot and lightly stir.
Serve over a bed of egg noodles and top with fresh parsley.

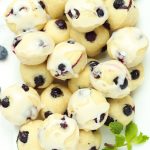
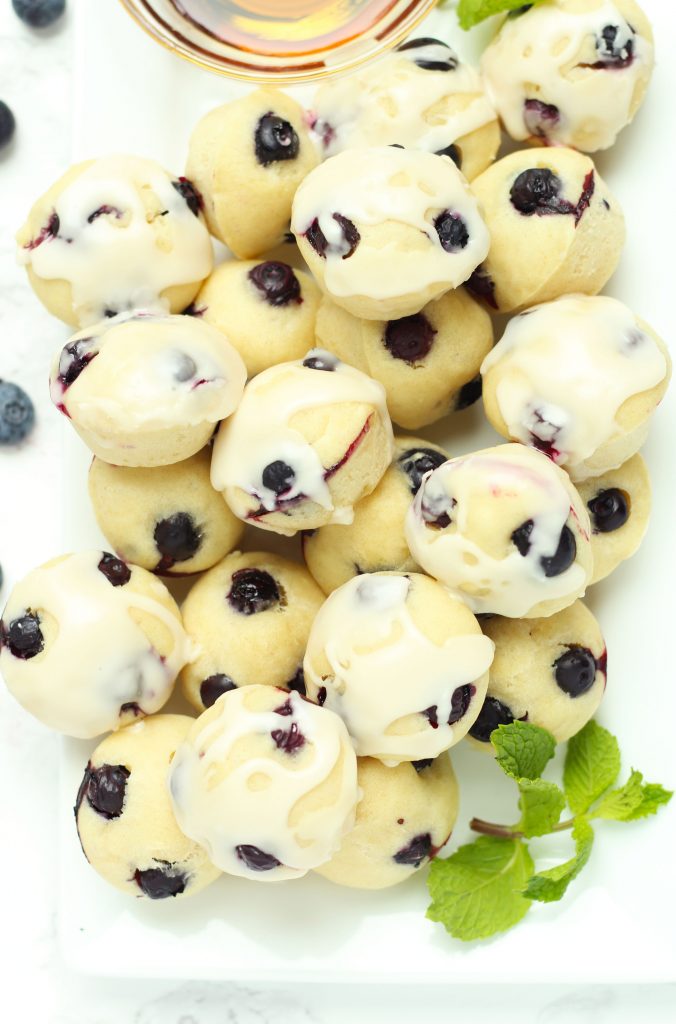
These delectable, Blueberry Pancake Bites are the perfect grab-and-go breakfast for busy weekday mornings. Top them with a maple glaze or serve them warm with a side of syrup. They will disappear in a flash.
My kids are absolutely obsessed with all things pancake or waffle for breakfast, lunch and dinner. The possibilities are just endless with lemon poppy seed, pumpkin spice, tiramisu, chocolate mint , red velvet (you get the point). Yes, we do have the occasional brinner around here and it makes us all the happier. I’m not what you would call a morning person, so these are the perfect weekday breakfast solution. Make these ahead of time and pop them in the microwave in the morning and get an extra 30 minutes of sleep…you’re welcome!

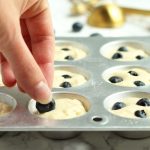
A cookie scoop is just perfect for filling up mini muffin cups. Press a few blueberries on top and add an easy, maple glaze. This is particularly useful, when your kids hide their Kindle under their pillow at night and won’t get up in the morning. No need to wait around for them to eat…just hand them a little bag and off you go. God, I love mornings and Blueberry Pancake Bites!

![]()
I added a bit of maple syrup and glazed around half of this batch. You can skip the glaze and dip’em if you so desire. My daughter ate several of them as a snack after school and seemed to like them just as much without it. I’m still trying to figure out how she suddenly became a fan of blueberry pancakes only in bite-size form. I literally, thought there was going to be a war when her uncle started eating the leftovers. You just don’t mess with a girl’s pancakes.
![]()
MORE TO LOVE


IS IT FRIDAY YET?


These Blueberry Pancake Bites are the perfect on-the-go breakfast with a maple glaze.
Whisk together lemon juice and milk; set aside.

Preheat oven to 375 degrees.
In a mixing bowl; combine flour, sugar, baking soda, baking powder and salt.
Create a well in the middle of the flour mixture; add egg and lightly whisk.

Add milk mixture, vanilla and melted butter. Lightly stir until combined.
Fill greased muffin tins around 2/3 of the way full. Lightly press 3 blueberries in each top.
Bake for around 11-12 minutes or until baked through.
In a medium bowl; combine powdered sugar, maple syrup and milk. Whisk together until smooth and drizzle over the tops of cooled muffins.

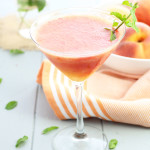
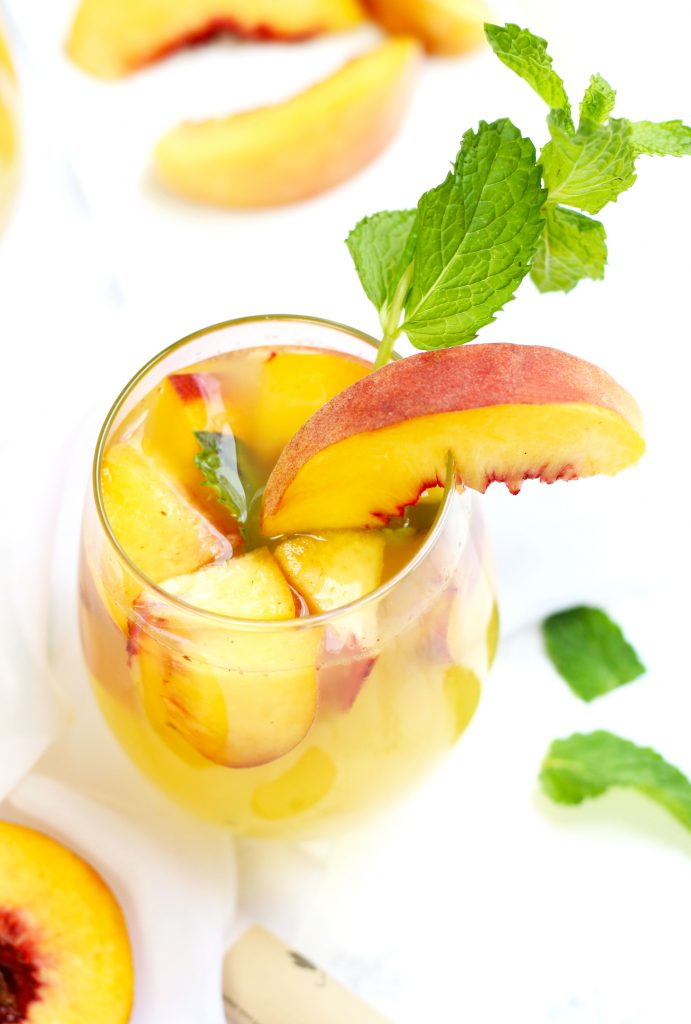
A Fuzzy Navel Peach Sangria is a celestial medley of everything that is right in this world. Plenty of fresh peaches get combined with a bottle of white Moscato, orange juice, peach schnapps, and vodka.
If you make a big pitcher of this, it will be quickly eliminated Terminator style. It might have something to do with just how great a fuzzy navel cocktail tastes thrown together with wine and peaches. I’m seriously, drinking a glass (or 3) of this while typing this post. Please forgive me if there are a few more typos (than usual). Luckily, I’ve hired my husband to be my editor. He gets paid via food and cocktails, so we are all winners.

A lot of brainstorming went into this creation (all 5 minutes or so). My original plan was to just make it a peach sangria with a bit of pie flavor. However, something made me think of the magnificence that is a Fuzzy Navel Cocktail. I mean, we’re talking peach schnapps, orange juice and vodka. These are a few of my favorite things, but not when the bee stings. Getting stung in the ankle bone by a bee just sucks. True story…it really happened to me last weekend.

My digressions have led me down a very bumpy road that will be regrettable later. Simply said, this drink is too good. You must mix up a pitcher of it immediately and share with your friends if you’re feeling altruistic.
That being said, I would love to take you through the pain-staking process of making this delightful sangria. Dump a bunch of sliced up peaches into a big old pitcher. Pour a whole bottle of White Moscato into said pitcher. Add orange juice, peach schnapps and vodka. Stir it up and try not to drink it all at once!

Yes, I have a slightly unhealthy obsession for Sangria. It is my number 1 go-to drink for entertaining (myself). If you love this Fuzzy Navel Peach Sangria, check out my Cocktail Page for even more inspiration.


NOT REGRETTABLE


Add sliced peaches to the bottom of a large pitcher.

Pour the Moscato over the top of the peaches.

Add remaining ingredients and lightly stir.
Serve over ice with a fresh mint sprig.


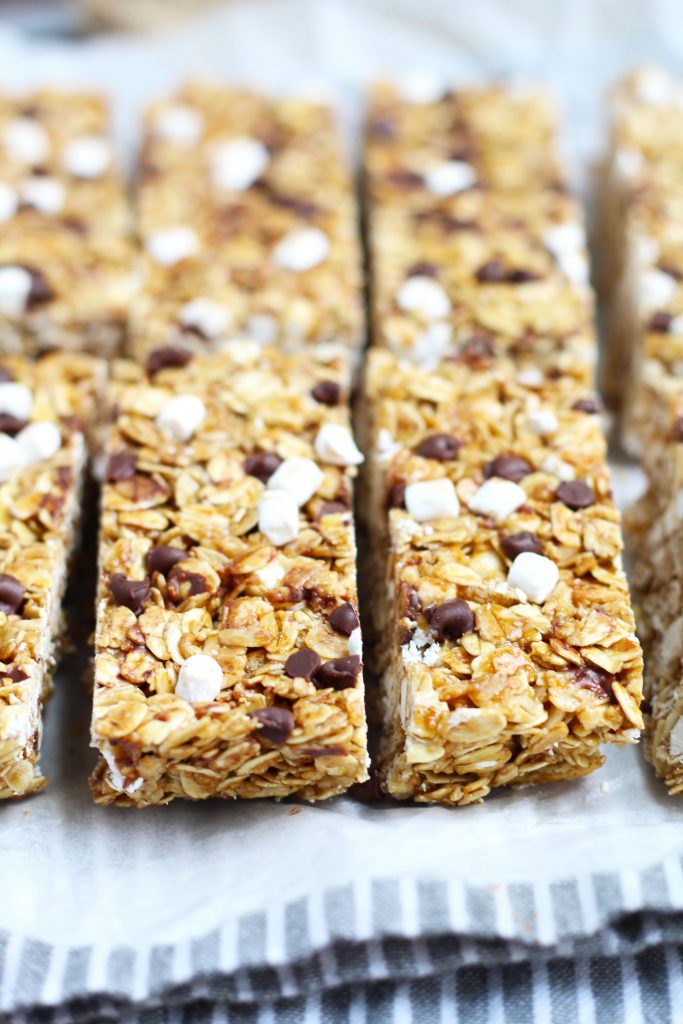
These Homemade S’mores Granola Bars are a great snack idea for the kids. They are easily made and require no baking with marshmallows, chocolate chips and crushed graham crackers. A bit of honey and molasses give these bars the perfect, chewy texture.

My kids are obsessed with these granola bars. As they are, with all things marshmallow and chocolate. I like to make a batch of these over the weekend and pack them for school snacks throughout the week (if I don’t eat them all myself). The biggest hurdle, is trying to keep little hands from stealing all the ingredients before getting everything in the mixing bowl. I’ve created mini little food blogging monsters. I caught them having a food photography session with their Leappad and fake kitchen food. My daughter, told me she wants to open a bakery when she grows up. The youngest wants to be a farmer. Sounds like a great opportunity for a farm to table bakery. Hopefully, the future farmer gets over her fear of animals…LOL.

You can easily, use this recipe as a good base and load’em up with all your favorite toppings. These bars would be great with nuts and dried fruit for a healthier option. A bit of flax-seed thrown in the mix never hurt the old digestive track anyways. The possibilities are just endless.

I started off this recipe by giving the oats a light toast in the oven for optimal granola bar flavor. While the oats are toasting, a bit of graham cracker gets crushed up in a baggie.

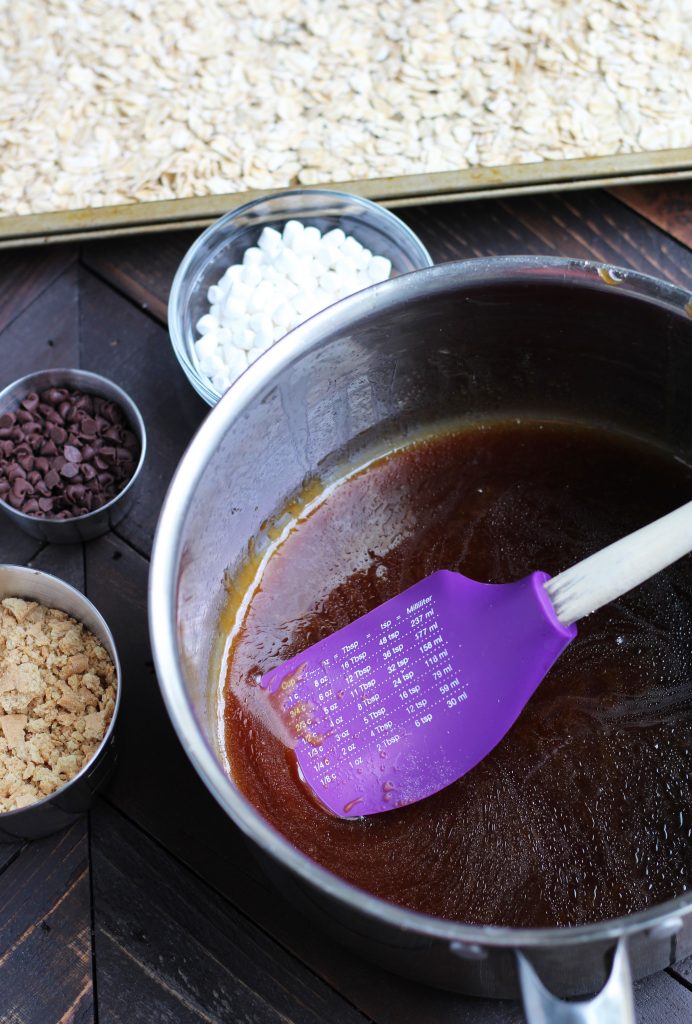
A bit of butter, brown sugar, honey and molasses get heated together to form the glue for a perfectly, chewy granola bar.
Allow the sauce to cool slightly; add the crushed graham crackers, chocolate chips and marshmallows. I found these Vanilla Mallow Bits at Target and they worked perfectly.

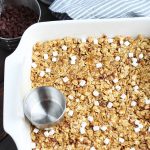
Transfer the sticky, oat mixture to a square baking pan and mash is down with the back of a measuring cup. Ensure you give the top an extra layer of marshmallow and chocolate chips!

Pop it in the freezer for around 30 minutes, cut it into rectangles and enjoy! I store mine an an air-tight container and it lasts for the week.

MORE TO LOVE


These chewy, Homemade S'mores Granola Bars have crushed graham cracked, marshmallow and chocolate chips and require no baking.
Evenly spread the oats onto the bottom of a baking sheet and toast at 325 degrees for around 10 minutes; stirring around halfway through baking time.

While the oats are toasting, prepare the sauce. In a medium saucepan; melt the butter and add the brown sugar. Cook on medium/high eat until the sugar dissolves into the butter. Mix in the honey, molasses, vanilla and salt. Remove from heat and allow to cool slightly.

After the butter mixture as cooled for a bit; stir in the oats until evenly coated. Lightly stir in the graham cracker, marshmallows and chocolate chips; reserving around 1/3 of the chocolate chips and marshmallows for the top of the granola bars.
Coat the bottom of a 9 inch square baking pan with strips of parchment paper; allowing the ends to hang over the sides for easy removal.
Add the oat mixture to the bottom of the baking pan and evenly spread the mixture. Top with the extra marshmallows and chocolate chips. Firmly press down the top with the back of a measuring cup.
Freeze for around 30 minutes until firm. Cut into desired serving size. Store in an airtight container for up to 10 days for best results.

This Fancy Mac and Cheese with Broccoli and Ham is a complete meal in one. Plenty of white and sharp cheddar cheese and a crispy, bread crumb topping make this a delectable meal that everyone in the family will enjoy.

No more box mac and cheese please! My 4-year-old daughter is obsessed with Panera’s Mac and Cheese. It is one of the few meals she requests for dinner, so I wanted to make something at home that would have a bit of extra heartiness from the ham and some veggies for a bit of green. Feel free to customize your cheesy experience by substituting bacon or chicken as well. The yummy possibilities are just endless when you have a good base recipe.

The secret to good mac and cheese is obviously plenty of cheese (if in doubt always add more). I added an extra layer of cheddar on top of the cheesy pasta like I’m making a lasagna…more cheese please! A bit of paprika and Dijon mustard give the sauce extra flavor. I love a Parmesan and Panko bread crumb topping for added crispiness. I could eat this topping by itself! Top it with a layer of fresh parsley for maximum enjoyment.

I don’t know if I want chocolate or vodka right now, so why not have both with a Salted Caramel Chocolate Martini? It has to be noon somewhere! I spent most of this week freaking out over the fact that my baby is starting preschool. The time just goes by way too fast! It seems like only yesterday she was my photography assistant; grabbing items off the table as I frantically try and snap them before the whole thing collapses to hell. I literally, became a blubbering idiot when I picked her up from school for the first time yesterday. Hopefully, I’m able to get a better blog routine going with the end of summer.

Hope you all like this Fancy Mac and Cheese with Broccoli and Ham as much as we do! It makes great leftovers for the busy week.
![]()


Plenty of cheddar cheese and a Parmesan and Panko bread crumb topping makes this one fancy Mac and Cheese recipe!
Prepare macaroni noodles according to package. Add the broccoli to the boiling noodles during last minute of cooking time; drain and set aside.
In a skillet on medium heat; melt 1/3 c. butter and add onions. Saute until they start to become translucent. Add minced garlic, salt and pepper; saute until fragrant. Add ham; stir until heated.
In the same pot used to boil the noodles on medium/high heat; melt 2 tbsp. of butter. In a large measuring cup or bowl; whisk flour into the milk until combined. Add flour to melted butter. Continue whisking until mixture thickens. Once thickened, add half of sharp cheddar cheese and white cheddar cheese. Stir continuously until melted. Add paprika and Dijon; salt and pepper to taste. Stir until combined.
Add noodles and skillet mixture; lightly stir until combined. Remove from heat.
Preheat oven to 375 degrees. Generously grease a 13x9 pan with butter.
Combine Panko bread crumbs and Parmesan. Melt 1/3 c. butter in a skillet on medium/high heat. Add bread crumb mixture, salted and pepper to taste and stir until lightly browned. Remove from heat.
Add half of the noodle mixture to the baking pan. Sprinkle half of the 8 oz. bag of sharp cheddar cheese. Top with the remaining half of noodles and sprinkle with remaining cheese. Sprinkle top with bread crumb mixture and fresh parsley.

Bake for around 15-20 minutes until cheese is melted. Broil for the last minute of cooking time.


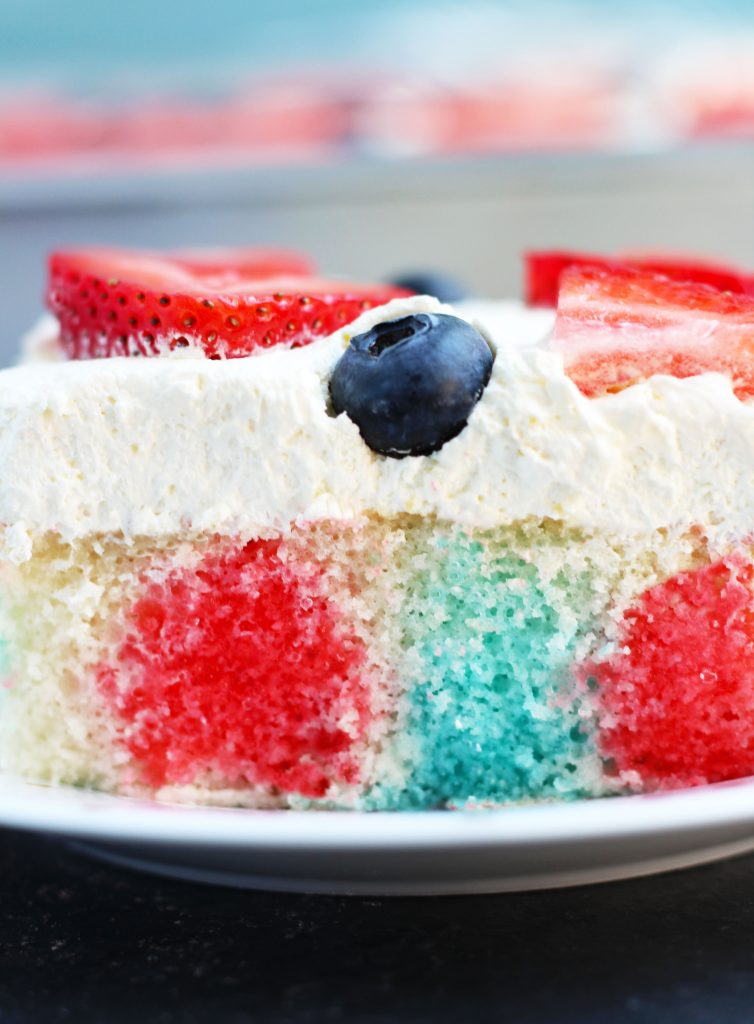
This Easy Red White and Blue Jello Cake is bursting with flavor and colors for a great summer dessert. You can also, switch out for your favorite Jello and top it with fresh berries. A cool whip and pudding icing keeps things light and refreshing with little effort.

Red White and Blue Jello Cake
As you can see, I’m running a bit behind with my blog posts lately. I still wanted to post this Jello cake as one of the easiest summer desserts that kids can really have fun with. You can make this into a fun rainbow cake and even add a few sprinkles for maximum kiddo enjoyment. I will definitely be making a version of this again before the end of the summer with a few new additions.

I was concerned that the red and blue Jello would bleed together; creating an ugly brown or unwanted purple effect. I took extra precautions to prevent any color bleeding by using a children’s medicine syringe to inject the Jello and letting the blue color set in the fridge for awhile before adding the red. I was thrilled with the end results. It was so much prettier than the Jello cakes I’ve made in the past. A topping of strawberries and blueberries keeps things festive and goes well with the Jello.

We ended of having a little BBQ with the family for the 4th and had some of this cake along with my Red White and Blue Jello Shots and Red White and Blue Pinwheel Rice Krispy Treats that my mom made. Needless to say, I don’t even remember what real food was on the menu. Beware of the sneaky effect of said Jello shots my friends.
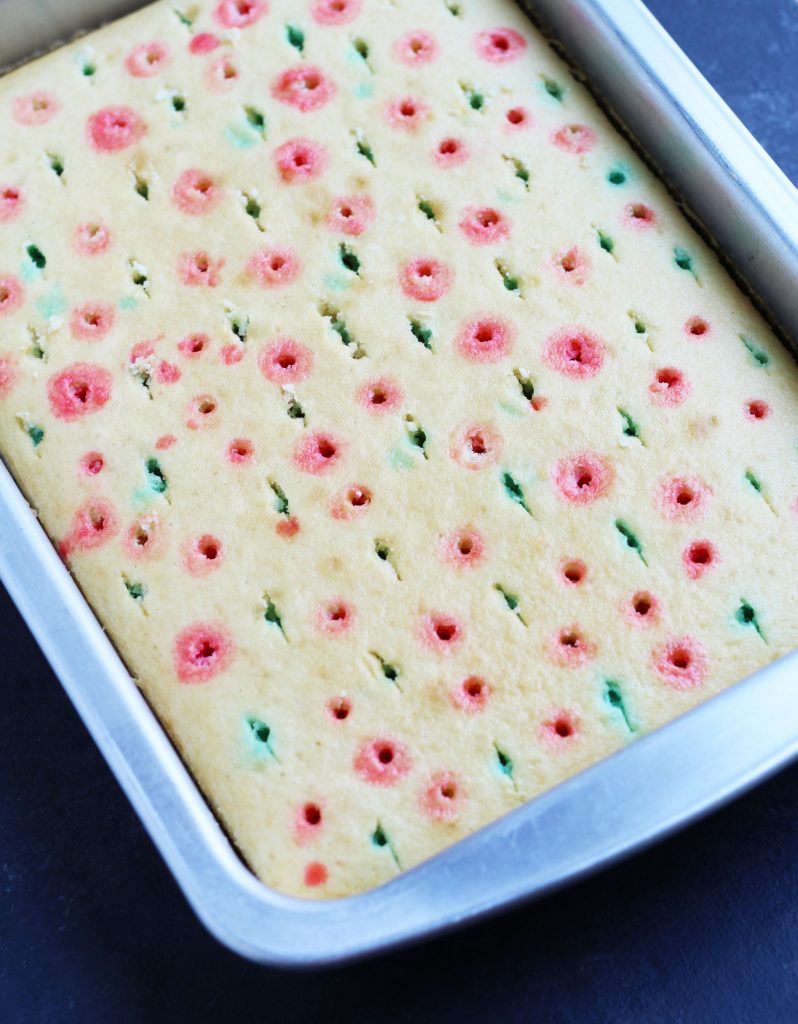
This cake looks like it has a case of the measles, but this is just to show the spacing I used for the different Jello flavors. I initially, used a butter knife to poke the cake, but then decided to go with the medicine syringe idea to prevent unwanted color bleeding.
RedWhite and Blue Jello Shots or a Pina Colada pair perfectly with your patriotic theme. An easy Fruit Pizza can also, be made with fresh strawberries and blueberries.


This Easy Red White and Blue Jello Cake makes a great addition to your summer holiday menu with a light cool whip and pudding icing.
Prepare cake mix according to package directions.
Allow cake to cool and prepare Berry Blue Jello according to package directions.
Allow Jello to cool slightly before adding to cake.
Using a syringe, inject cake with around 1 tsp of Jello around every inch. You may also, just poke the cake with a butter knife and pour jello with a teaspoon.

Place cake in refrigerator and allow the Blue Jello to set for around 2 hours before adding the Red Jello. This keeps the colors from bleeding.
Prepare the Strawberry Jello according to the package instructions; allow to cool. Inject the Jello around ever 1 inch between the Blue Jello.
Refrigerate for at least 4 hours before adding the icing.
For the icing, in a large bowl; stir the vanilla pudding mix in with the cool whip until smooth and thickened. Spread over the top of the cake. Refrigerate until ready to serve.
Add sliced strawberries and blueberries to the top right before serving for best results.

These festive, Red White and Blue Jello Shots can be made with or without alcohol and are perfect for summer holidays and BBQ’s. Mini muffin tins can be used to make preparation effortless with even layers.
…
Copyright © 2026 Holly Doerr All Rights Reserved.