These festive, Red White and Blue Jello Shots can be made with or without alcohol and are perfect for summer holidays and BBQ’s. Mini muffin tins can be used to make preparation effortless with even layers.
…
Specializing in Brunch, Desserts and Cocktails
These festive, Red White and Blue Jello Shots can be made with or without alcohol and are perfect for summer holidays and BBQ’s. Mini muffin tins can be used to make preparation effortless with even layers.
…
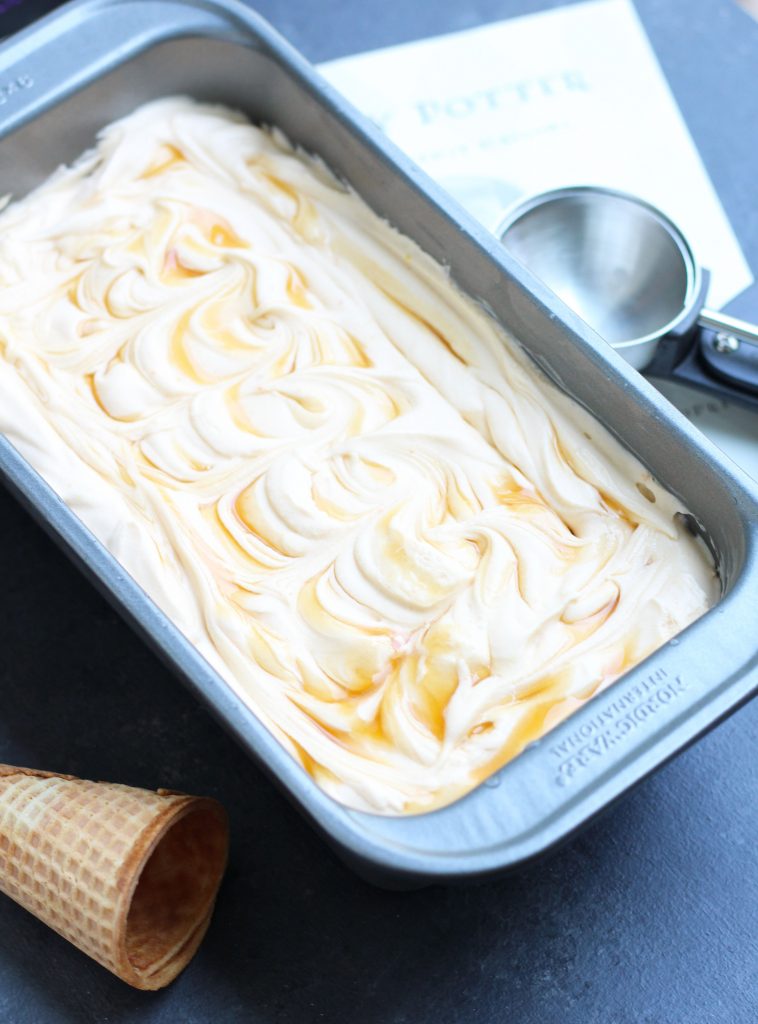
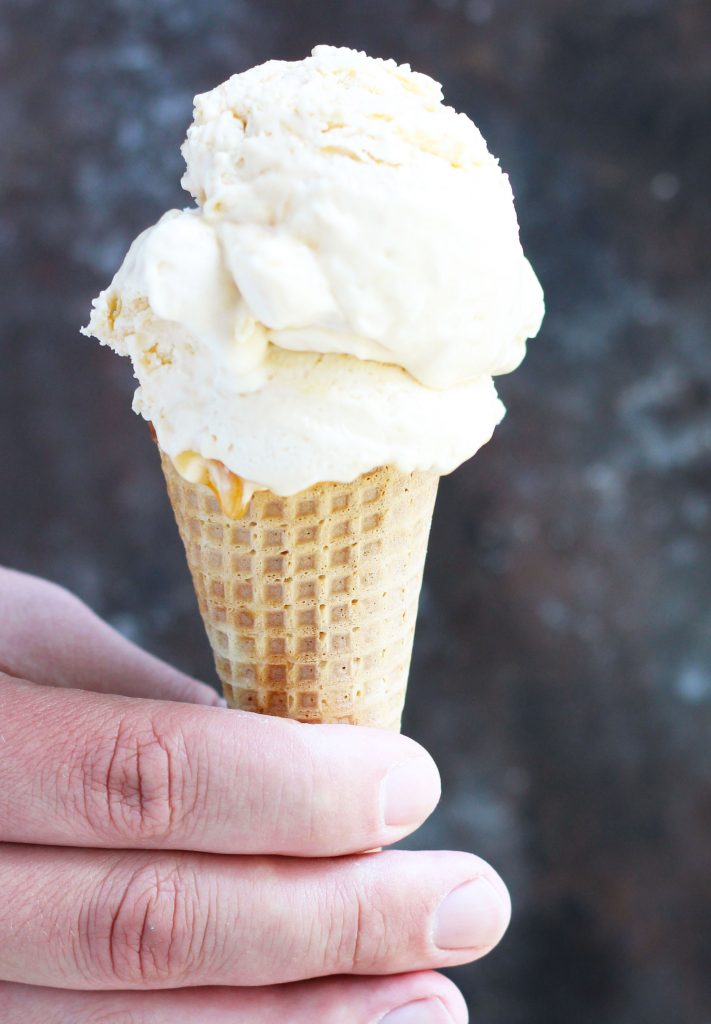
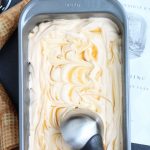
This Harry Potter No-Churn Butterbeer Ice Cream is a creamy mixture of caramel and butterscotch with an optional bit of schnapps for adults! Its the creamiest ice cream I’ve ever had without the necessity of an ice cream maker.
I just soaked up every Harry Potter book upon its release during my college years. Its still by far one of my favorite book series (and I’ve read a few of them).
I’m a sucker for dystopian novels that tend to make an appearance at the movie theater soon after reading. I just love all the imaginative creations Rowling gave us particularly, Butterbeer! The next question is, where can I get me some of that?

I happened to notice on social media a few weeks ago that Butterbeer Ice Cream is actually available at certain stores. This flavor is so genius, so I had to try making my own. It was the perfect excuse to add alcohol to ice cream.
Butterscotch Schnapps is staple in my liquor cabinet (makes an excellent addition to a caramel latte) and was discovered to go great in ice cream. As a bonus, alcohol also acts as a softener when making frozen confections. It gives you that creamy, dreamy texture that makes soft serve ice cream so much better.

I really don’t have time for a lot of fuss when making my desserts and wanted to make this recipe as easy as possible. A bit of instant butterscotch pudding, caramel sauce and Butterscotch Schnapps get added to plenty of whipped cream and sweetened condensed milk for this no-fuss recipe you will definitely want to make again and again.
If you like this Harry Potter No-Churn Butterbeer Ice Cream, be sure to check out these 15 No-Churn Ice Cream recipes for further summertime dessert inspiration. There is no need to spend money on an ice cream maker with so many great options like these.
Stay cool and refreshed out there and with plenty of frozen cocktails found on my Cocktail Page.


This Harry Potter No-Churn Butterbeer Ice Cream with butterscotch and caramel flavors is super easy to prepare without an ice cream maker. An optional bit of Butterscotch Schnapps is added for the adult version.
In a chilled bowl; beat heavy whipping cream on high until stiff peaks form.
Slowly beat in sweetened condensed milk, pudding mix, kosher salt and vanilla until mixed.
Add half of the ice cream mixture into a loaf pan.
Drizzle half of the caramel syrup onto the top of the ice cream mixture. Lightly swirl in the caramel syrup using a butter knife.
Add remaining ice cream mixture on top and swirl remaining caramel syrup.
Tightly cover with plastic wrap and freeze for at least 5 hours before serving.
Allow ice cream to defrost for a few minutes before serving.

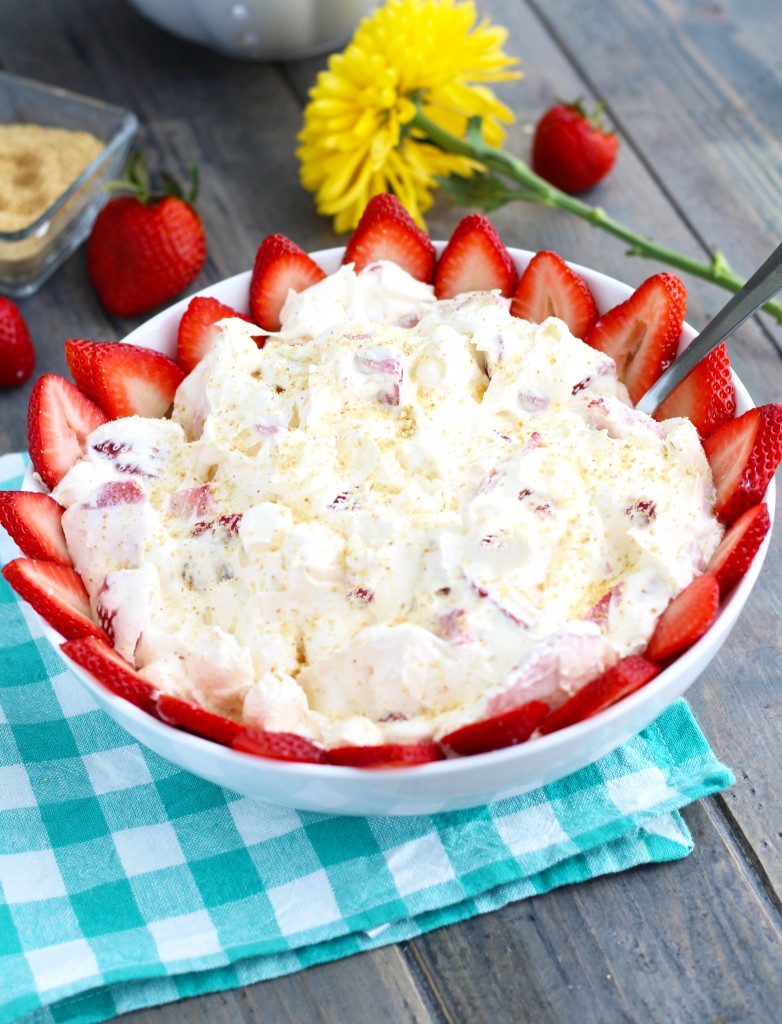
This Strawberry Cheesecake Fluff is the ultimate, easy summertime dessert. It is perfect for potlucks and summertime BBQ’s and can be thrown together quickly with pudding, cool whip, sour cream, fresh strawberries and a graham cracker crumb topping.
I used to love picking the marshmallows out of the ambrosia salad my mom always used to make for potlucks. This dish is inspired by that, but with the yummy cheesecake flavor I just can’t get enough of.
It was definitely a hit with my whole family [my daughter got upset anytime someone tried to eat some of it]. We were about to have a total Gollum from “Lord of the Rings” type of situation.
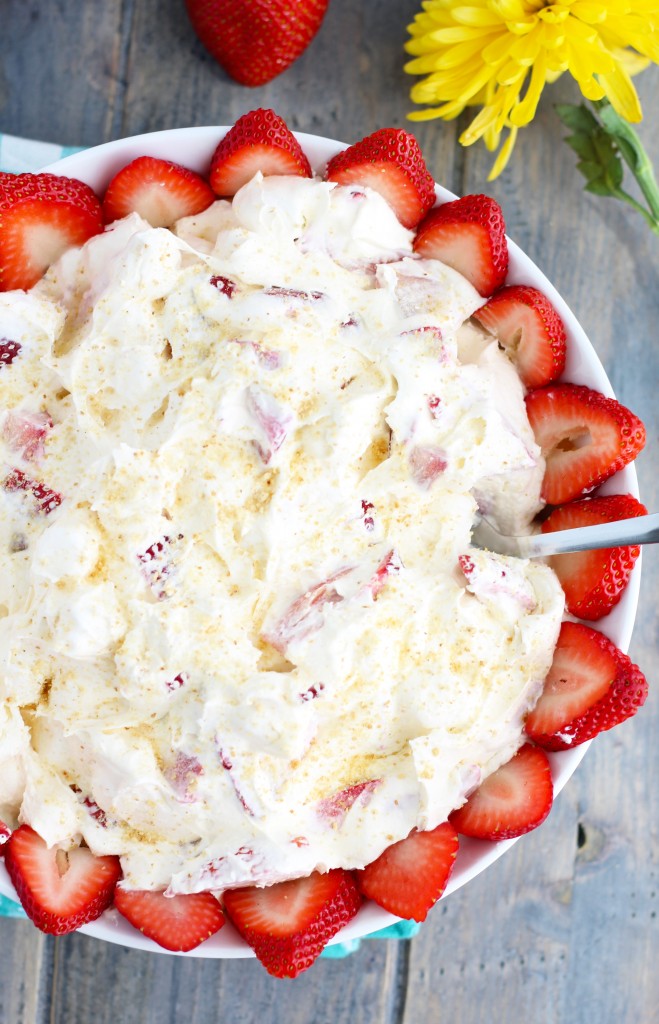
A ring of fresh strawberries makes this dish look fancier and adds a beautiful pop of color. A sprinkle of graham cracker crumbs enhances the cheesecake flavor experience. No need to heat up the house with that oven as the days become warmer [I think is going to be warmish today].
Maybe, spring is finally starting to sprout around these parts. In any case, I refuse to wait for warmer weather to indulge in plenty of frozen cocktails and no-bake desserts.

If you enjoyed this Strawberry Cheesecake Fluff, I highly recommend also adding an Easy Fruit Pizza or Chocolate Strawberry Cheesecake Lasagna. They are both fruity, easy to make and require no baking!
MORE TO LOVE


This easy, Strawberry Cheesecake Fluff is perfect to throw together for summer BBQ's and potlucks.
In a large bowl; mix together sour cream, sugar and lemon juice.
Add pudding mix and cool whip; stir until smooth.
Gently fold in marshmallows and strawberries. Sprinkle top with graham cracker crumbs.
Cover and refrigerate for at least 3 hours before serving.
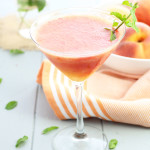
This Strawberry Rhubarb Cobbler is super easy with frozen rhubarb and fresh strawberries! Just layer the fruit and top it with a dough batter and melted butter for a delicious dessert that is so good with plenty of vanilla ice cream on top!
…
These Glazed Orange Scones taste just like my favorite decadent treat from Panera! I’m in love with their cakey texture with crisp outer edges and that orange GLAZE! The perfect amount of sweet citrus taste to balance out these addictive confections.
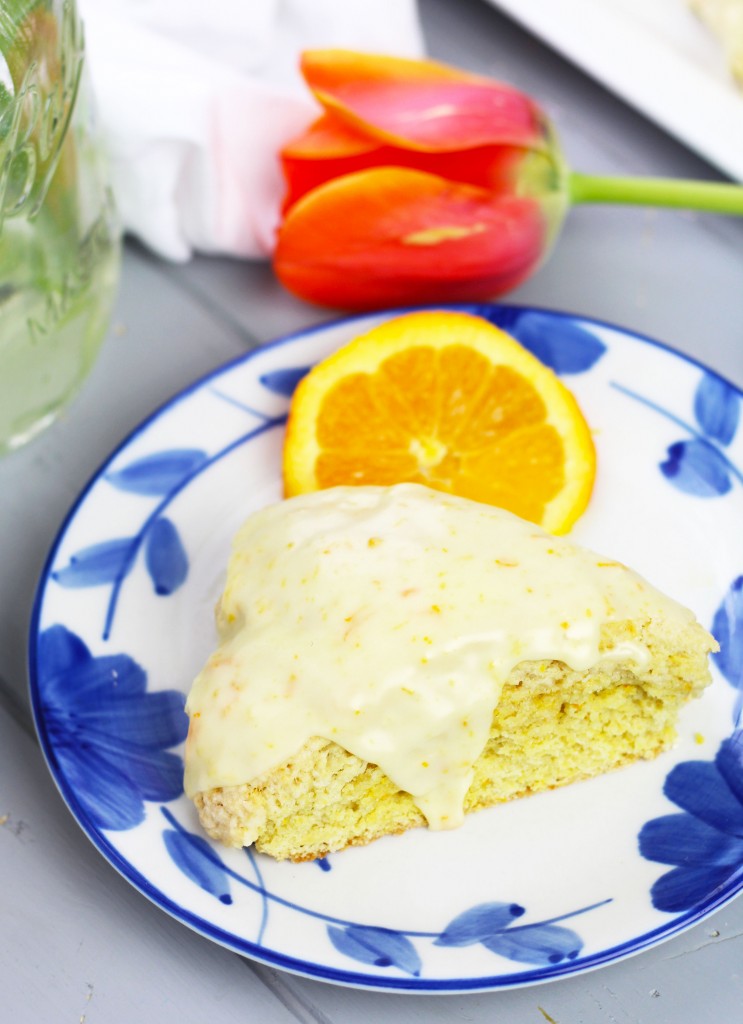
I can remember seeing orange scones at Panera and thinking what are these biscuit-looking delights with a layer of glazey goodness? I’d never had the pleasure of sampling a scone and am so glad that I did! One bite later and I was addicted for life. I’ve dabbled with other great flavors, but have never found one that I liked as much as these beauties.
…
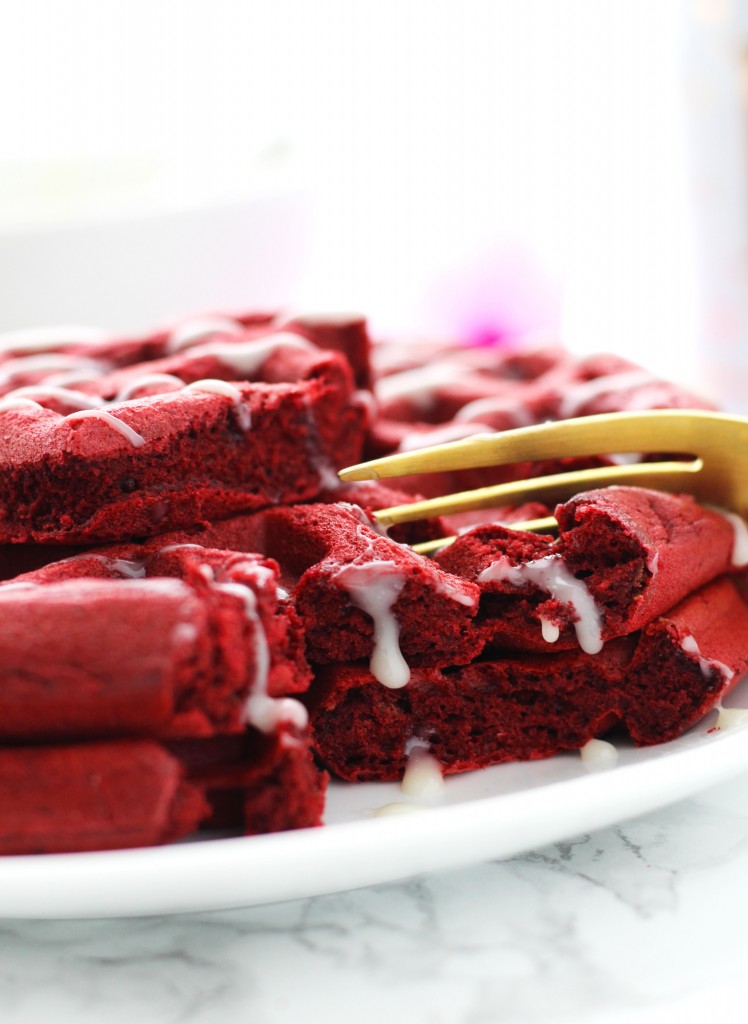
These Red Velvet Waffles with White Chocolate Glaze are perfect for your sweetheart on Valentine’s Day! They could be eaten for breakfast or dessert and are perfectly, fluffy with an easy glaze that is made in the microwave.

My husband is obsessed with red velvet anything, so it was perfectly fitting to make him a batch of Red Velvet Waffles the weekend before Valentine’s Day. They were thoroughly enjoyed by my daughters as well (maybe too much). Good luck to me, trying to get them to eat anything for lunch!
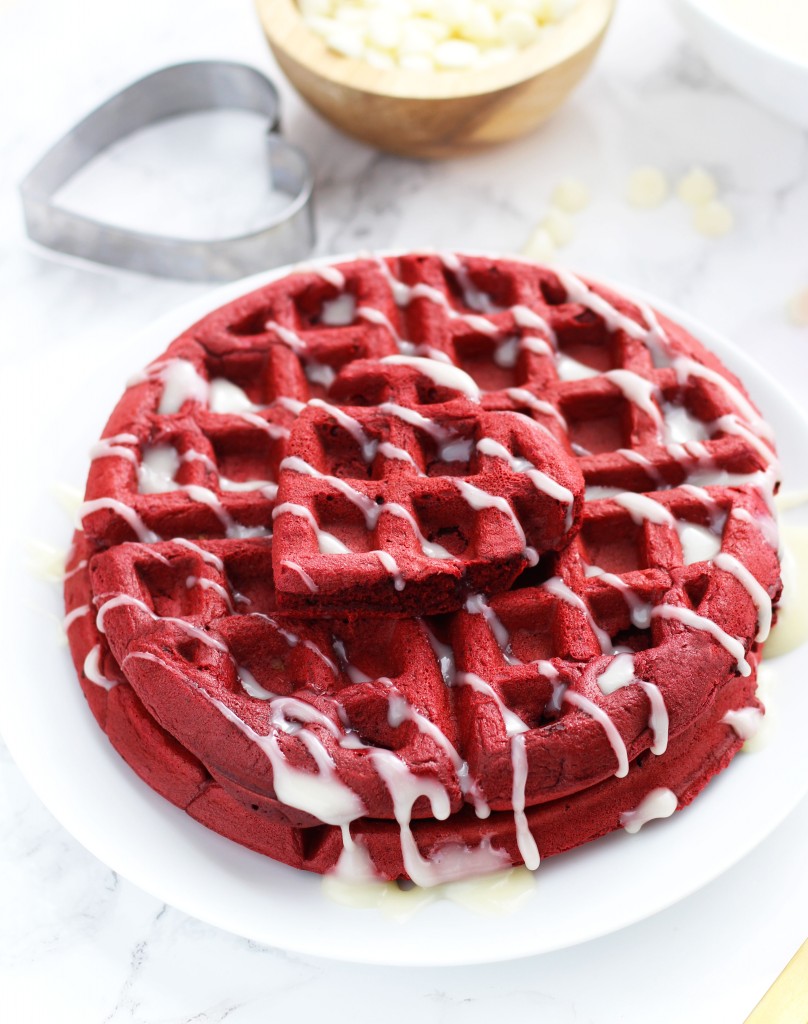
These beauties are so delectable that they could even be enjoyed as an after-dinner dessert. I could easily, see using a cookie cutter to make a heart-shape and topping it with vanilla ice cream and plenty of chocolate sauce. I need to go save a few pieces while I still can to try this idea out! Wouldn’t, it also be cute to use a star-shaped cookie cutter for 4th of July and top it with fresh blueberries and whipped cream? So many options, so little time!

Waffles or pancakes are mandatory around here every Sunday. You haven’t lived until you’ve tried Tiramisu Pancakes and can never go wrong with delectable, Buttermilk Blueberry Waffles. I’m always testing out new recipes and really think I hit the jackpot with these. A lot of people like cream cheese icing or glaze with their red velvet, but you have to try this easy, white chocolate glaze! There is no big mess to clean up with beaters and no waiting for cream cheese to soften. This glaze is made in the microwave with zero fuss! Feel free to drizzle a bit extra for red velvety greatness. I may have dipped my waffle in the bowl like chips and dip.
If you love these Red Velvet Waffles with White Chocolate Glaze , be sure to have a cocktail while you’re at it! My Pineapple Orange Creamsicle Mimosas are a must. You may fancy yourself a Pancake Shot for a lovely digestif. Visit my Cocktail Page for all of my favorite adult beverages.


In a small bowl; whisk together milk and lemon juice; set aside.
In a large bowl; combine flour, baking soda, baking powder, salt and cocoa powder.
Create a well in the middle of the dry ingredients and add eggs and vanilla into the middle; lightly whisk eggs.
Pour melted butter and milk mixture over the top of the eggs and stir until combined.
Add several drops of red food coloring until desired color is achieved after stirring.
Lightly spray a round, hot waffle iron with nonstick cooking spray.
Scoop around 2/3 of a cup of waffle mixture onto the iron.
Remove waffle once firm and cooked through.
Add chocolate chips, butter and light corn syrup into a small microwave-safe bowl. Cook on 50% power for around 1 minute. Lightly stir and repeat; add milk or whipping cream and cook for an additional 30 seconds on 50% power; stirring until mixture is smooth. Immediately, drizzle glaze over tops of warm waffles.
Use cookie cutters to make heart-shapes after waffles have been cooked. Place them on top of whole waffles for a decorative touch.
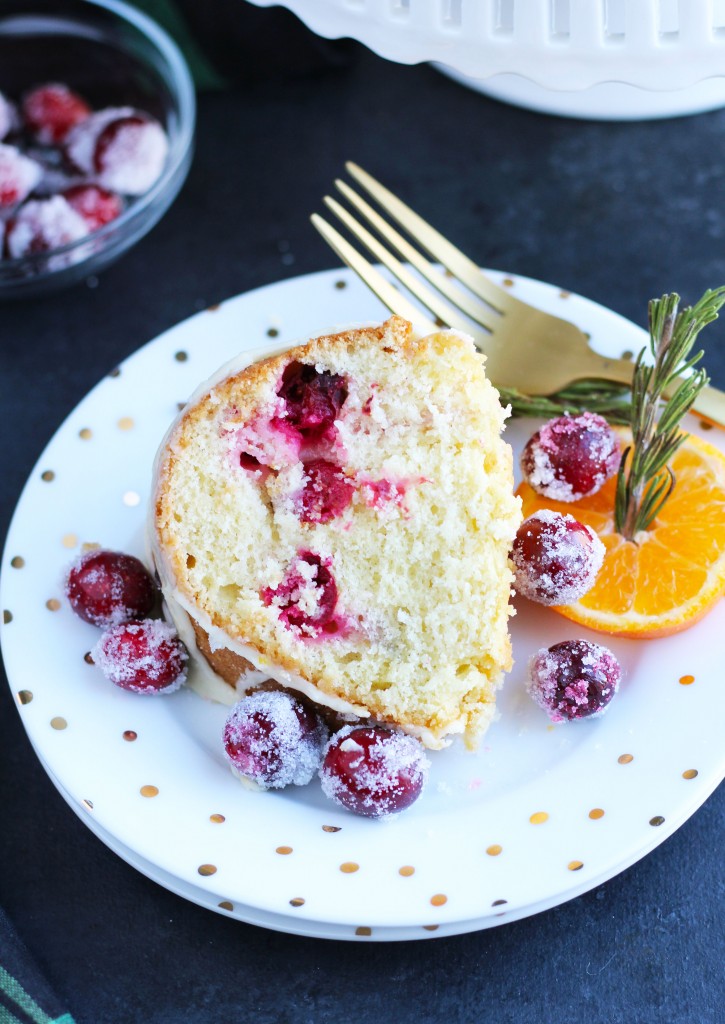
This Cranberry Orange Bundt Cake with orange glaze and sour cream is so festive for the holidays. It is perfect for brunch or makes a decadent dessert with sugared cranberries spilling out of the top.

I was going to wait until next year to share this recipe, but really couldn’t deny any last minute holiday bakers. I think this cake is gorgeous for any wintertime party and would be great for New Year’s eve. I’m so obsessed with it…I love how the cranberry flavor balances out the sweetness of the oranges.

I made a batch of sugared cranberries by giving them a bath in homemade simple syrup; followed by rolling them around in a bowl of sugar. The sweetness of the sugar really helps balance out any bitterness from the cranberries. I made a few extra for a perfectly festive, Christmas Cosmopolitan. It was SO necessary after dealing with sick kids for over a week now. My daughter woke me up at least 5 times last night and asked my husband, why it was taking so long for it to be light outside?!

I really love the look of filling a bundt cake hole with plenty of goodies (no innuendo intended). It all started with my Chocolate Banana Split Cake. Nothing like an extra, fruity bonus with any confection. The healthiness of the fruit balances out the sugar and butter, right? I think the cranberries retain their antioxidants after taking a sugar bath. I just love these win/win situations.

Okay, my mind is complete jello right now after 3 hours of sleep. It’s time to order take out for Christmas eve and drink several glasses of Moscatao. I would rather have a Christmas Sangria, but tomorrow brings Christmas with great brunch and Whiskey Sour Slushes (make a great present).

Please excuse excessive usage of pictures…I really had trouble eliminating any of them!
FAVORITE HOLIDAY TREATS


FAVORITE HOLIDAY COCKTAILS


This decadent Orange Cranberry Bundt Cake is made with sour cream and plenty of orange glaze.
Mix together salt, flour, baking soda and baking powder.
In a large mixing bowl; cream together sugar and butter; beat in triple sec, vanilla, orange juice and eggs.
Slowly beat in the flour mixture.
Beat in the sour cream.
Stir in the cranberries.
Add batter to a greased/floured (10") bundt pan.
Bake at 350 degrees for around 50 minutes or until cooked through when poked with a toothpick. Flip cake over onto a cooking rack and allow to cool before adding the glaze.
Beat together powdered sugar, orange juice and orange zest. Start by adding 2 tbsp. of orange juice and add 1 tbsp. more if glaze is too thick.
Drizzle over the top of the cake with a teaspoon.
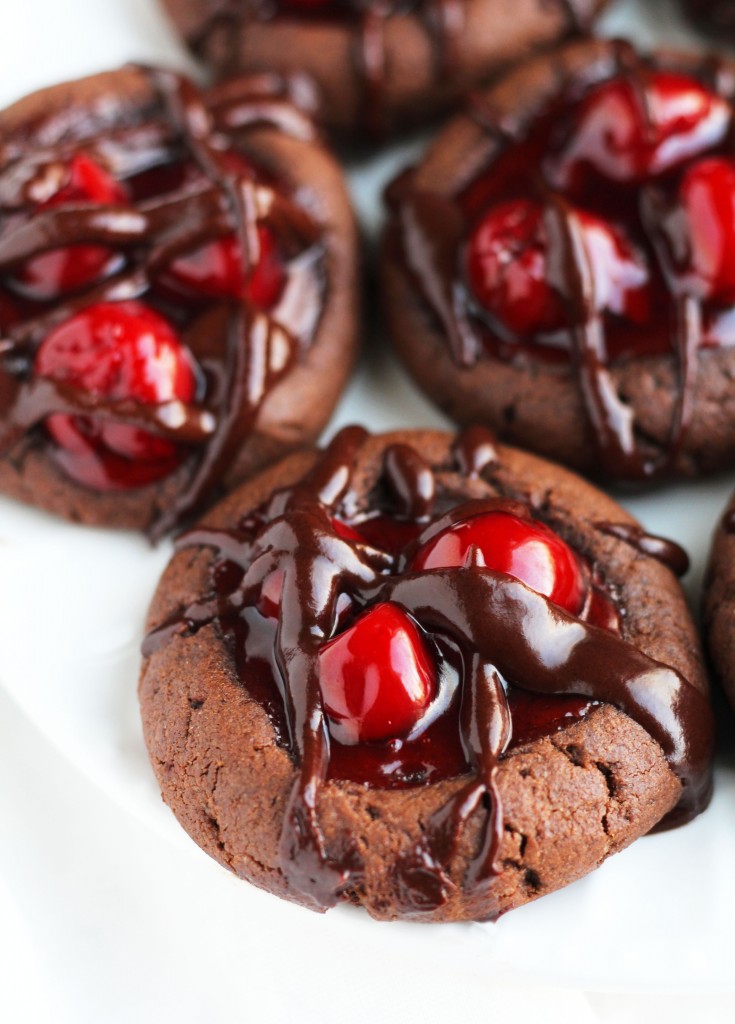
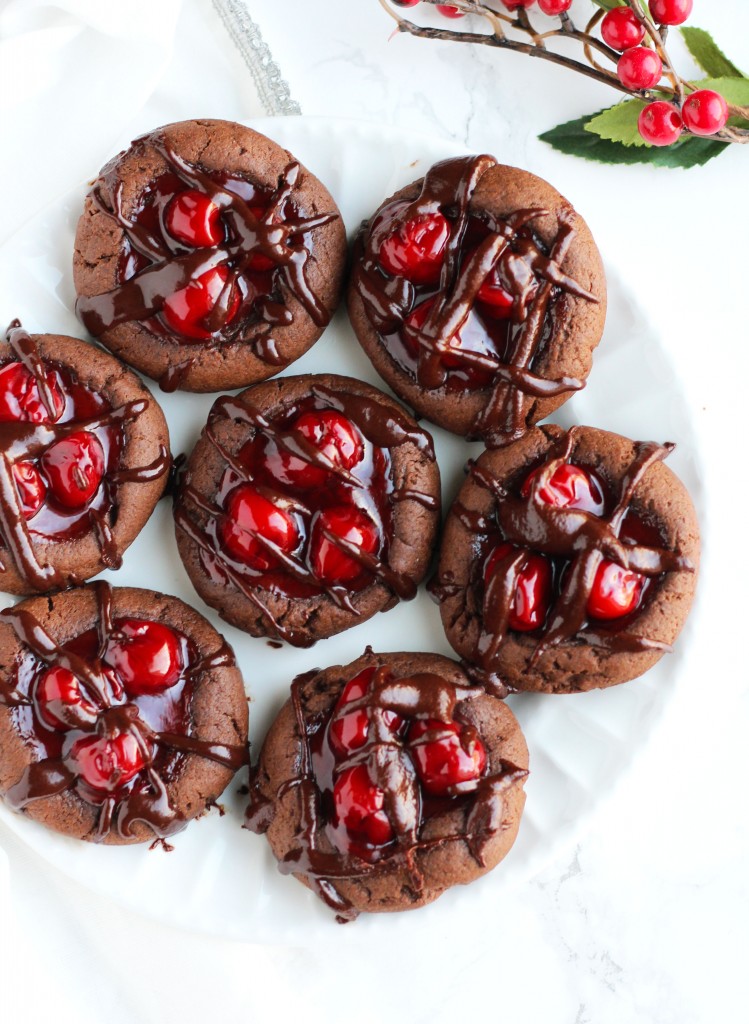
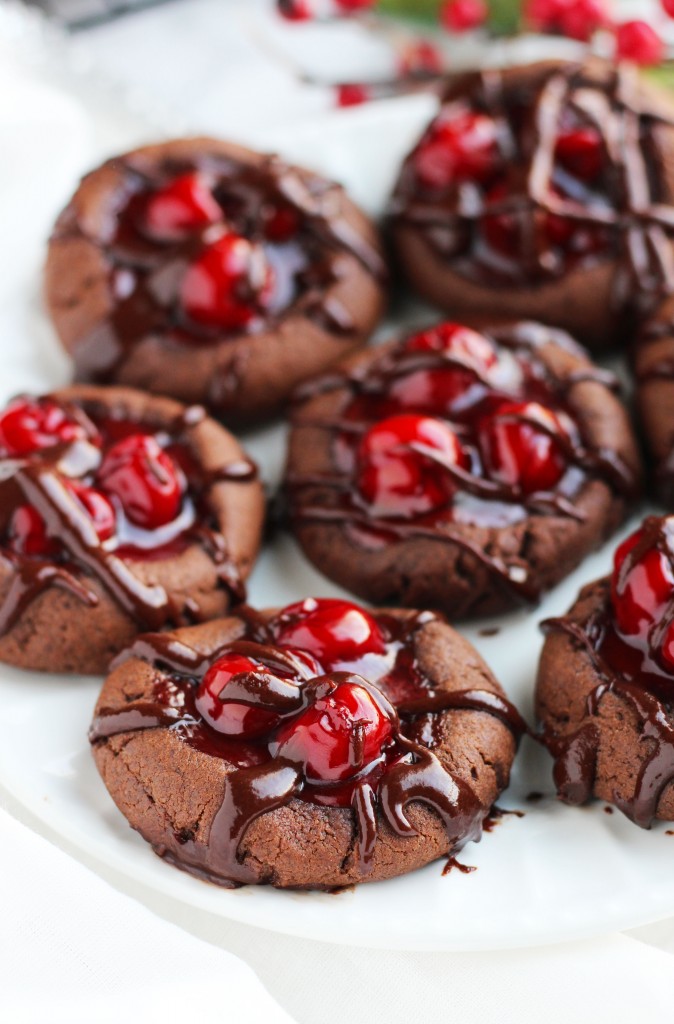
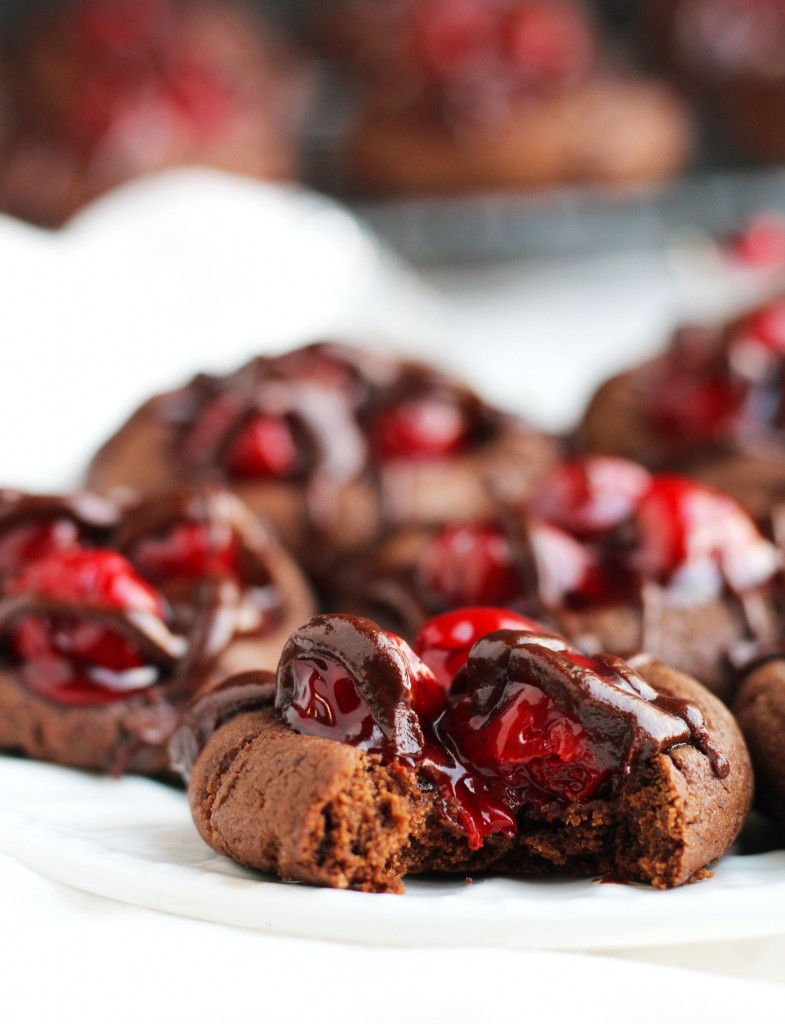
These Chocolate Cherry Thumbprint Cookies are a delightful balance of soft, chewy and chocolaty. A double thumbprint makes way for plenty of cherries with a delectable, chocolate glaze topping…the perfect holiday cookie!
This is the new and improved recipe for these thumbprint cookies. I made a version of them last year, but found them to be a bit too dry and lacking chocolate. These are perfectly moist and have glaze for days. Did I mention how good the glaze is?

These are a lot easier to make than you think. A double thumbprint allows for plenty of room for an extra cherry or 2. I prefer 3 cherries on each cookie for maximum enjoyment. If you aren’t a big fan of cherries, you could just add one for a festive garnish. However, I’m not a cherry worshiper and loved every last bit of these. The chocolate and cherry combination is amazing with the texture of these beauties.

I recommend buying a cookie scoop if you don’t already have one. I finally made the small investment and love how much easier it is to make the cookies the same size. The kids will have a lot of fun helping you roll the dough or placing cherries on top.
Sorry for the obscene amount of pictures here, but I just love the way these turned out. I switched window locations and am so much happier with the lighting now. The new house is playing some serious trick on me!
I will not divulge who took a bite out of this cookie and possibly several more following it…LOL! Seriously, these are dangerously addictive and need to be given away shortly after baking to avoid a situation with getting your pants on.
If you love these Chocolate Cherry Thumbprint Cookies, check out some of my other favorite treats! These Pumpkin Gooey Butter Cookies are a must try!


These Chocolate Cherry Thumbprint cookies are the perfect balance of soft and chewy with a delectable chocolate glaze topping!
In a medium bowl; combine flour, baking soda, baking powder, salt and cocoa powder. In a separate large bowl; cream together butter, sugar, brown sugar, egg and vanilla. Slowly beat in the flour fixture until combined. Scoop a rounded tablespoon of cookie dough and roll into a ball. Place ball on a cookie sheet lined with was paper. Press down on the center of the cookie dough ball using your thumb. Press down with your thumb again crossing over the original thumbprint; creating an x-shape. Spoon around 3 cherries onto the middle of each cookie. Bake at 350 degrees for around 9-10 minutes.


This White Chocolate Peppermint Bark Cheesecake is inspired by one of my favorite holiday recipes at the Cheesecake Factory. Peppermint bark ingredients get mixed in the cheesecake batter and topped with a simple, white chocolate mousse. A garnishment of whipped cream, peppermint candies and chopped chocolate complete this festive dessert.

This cheesecake is so dreamy and creamy with just the right amount of moisture added from a bit of sour cream. Melted white chocolate gets mixed in the batter before baking over a sweet, Oreo crust. I can’t tell you the amount of self control it is taking me to stay the heck out of my refrigerator right now. My husband was literally chasing me with a plate of mini cheesecakes that I attempted to ban him from.

Cheesecake is such a fickle creature…I don’t even want to tell you some of the failures I’ve had in the past. The secret to good cheesecake is not overcooking, adding the right bit of moisture for texture and cooling SLOWLY. No problem, right!? Cracks really can kill (and not just the plumber kind). The good news with this recipe, is that a few cracks will not ruin the appearance of this cheesecake due to the white chocolate mousse layer.

This is my 2nd go at creating a Christmas cheesecake. The first version had layers of chocolate and vanilla cheesecake with a layer of chocolate glaze. I found this to be a bit rich and prefer the combination with white chocolate.
Wrapping the spring-form pan in foil and cooking it in a bath of water, really does help prevent disastrous results. Just be sure, to securely seal it to avoid leaky situations. The game of oven on and oven off also seems to help. I would also advise, to run a knife around the sides of the pan once removing the cheesecake from the oven to avoid sticky situations.
HOLIDAY TEMPTATIONS


This White Chocolate Peppermint Bark Cheesecake is inspired by one of my favorite holiday recipes at the Cheesecake Factory. Peppermint bark ingredients get mixed in the cheesecake batter and topped with a simple, white chocolate mousse. A garnishment of whipped cream, peppermint candies and chopped chocolate complete this festive dessert.
Combine crushed Oreos, 5 tbsp. melted butter and 1/4 C. sugar. Firmly press into the bottom of a 9 inch spring-form pan; using the back side of a measuring cup.
Wrap sides of pan with foil.
Bake at 325 degrees for 10 minutes.
Melt chocolate chips in microwave on low power until melted; avoid over-cooking.
In a mixing bowl; add cream cheese, sugar and vanilla. Beat for a couple of minutes until smooth. Add eggs 1 at a time and continue beating. Add flour, melted chocolate chips and sour cream; continue beating on low until combined. Stir in peppermint candies and chopped chocolate. Add cheesecake to a roasting pan and fill until around 1/3 of the way full with warm water. Bake at 325 degrees for 1 hour. Turn oven off and leave cheesecake in oven for an additional 30 minutes. Remove from oven and water; run a knife along the edges of cheesecake. Leave in the pan until cool. Once cooled, remove cheesecake from the pan and refrigerate for at least 4 hours before adding mousse to the top.
Prepare Mousse:
Microwave chocolate chips on low heat with a 1/4 C. Heavy Cream. Stir until smooth. Allow melted chocolate chips to cool completely. Once cooled, add 1 C. of heavy cream to a mixing bowl. Beat until stiff peaks form. Add powdered sugar and continue to beat until thickened. Fold in white chocolate mixture until combined. Add to the top of the cheesecake and refrigerate for at least 2 hours before serving. Garnish with crushed peppermints, chopped chocolate and whipped cream before serving.

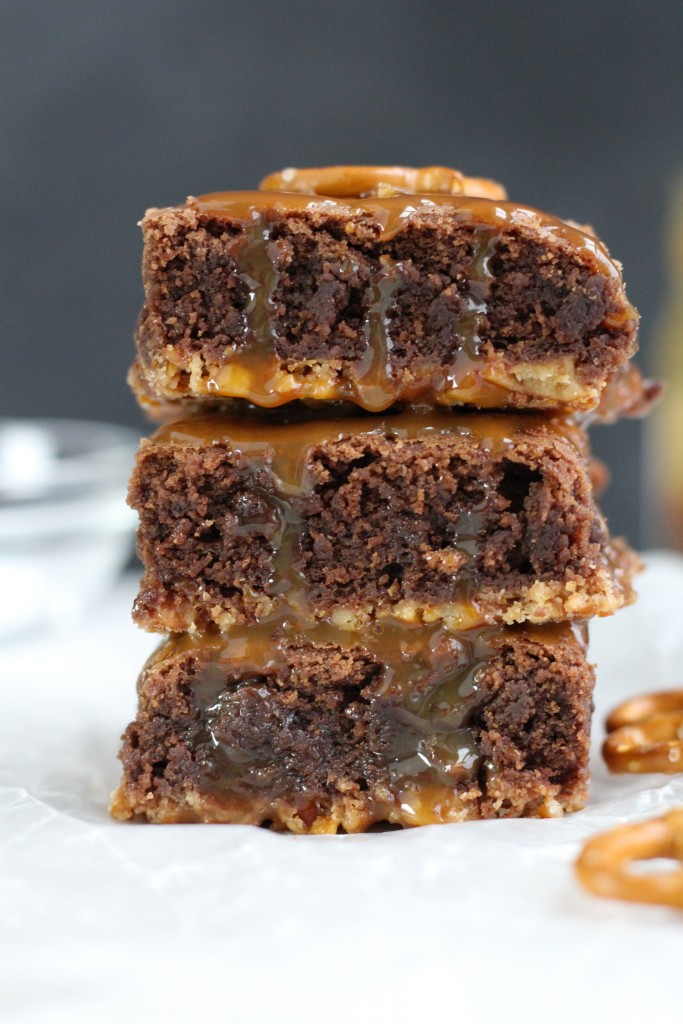
These Salted Caramel Pretzel Brownies are perfectly thick and chewy. A pretzel crust adds a slightly crunchy texture with a caramel sundae topping and pretzel garnishment. No need to wait for an edge piece with these beauties!

Have you seen those brownie pans where every piece is an edge piece? Well, I guess I’m not the only one scooping out those edges while the brownies are still warm. That sweet, crispy texture gets me every time. At last, no more fighting for those edges! This pretzel crust is all the crispy you will ever need.
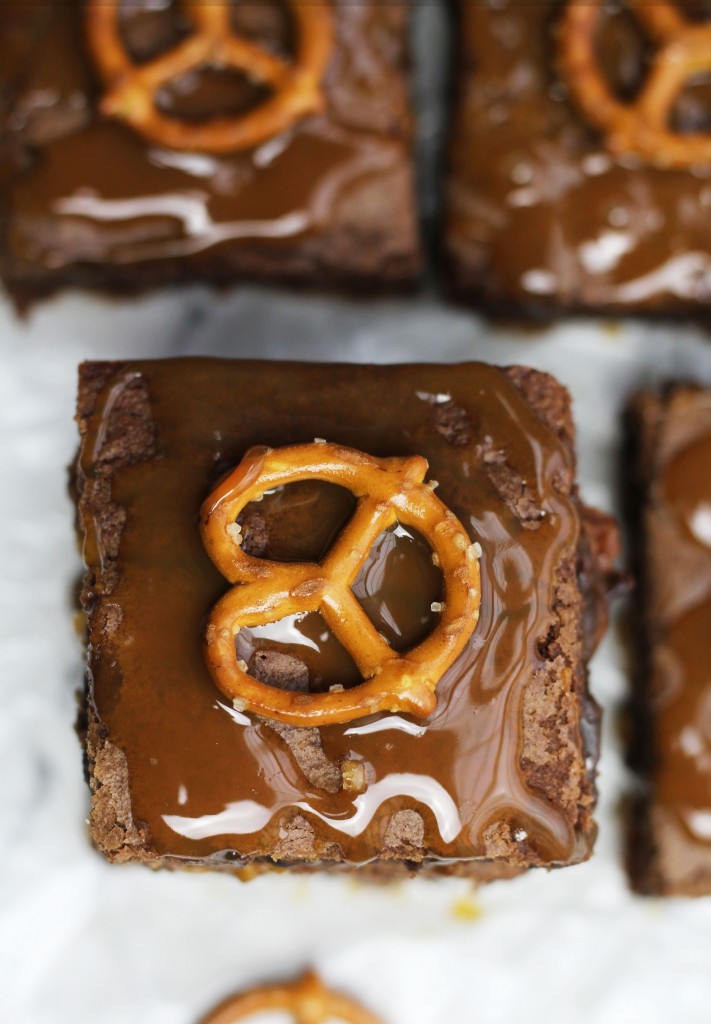
I debated on whether to make the caramel sauce from scratch, but decided simple is what I have time for! A nice jar of caramel sundae syrup with a sprinkle of kosher salt is all you’ll ever need. No one wants to wait longer than they have to to dig into pure chocolate delight.

My fixation with caramels and pretzels has no end in sight! It started with one of my first posts, the Salted Caramel Chocolate Martini. Things got a bit crazier with my idea to add the topping onto sweet potatoes, and now we have it with these brownies. I can’t promise it won’t happen again!
MORE TO LOVE


Make the pretzel crust: Preheat oven to 350 degrees. Mix together melted butter, sugar and crushed pretzels. Line bottom of a 12 X 9 baking pan with parchment paper; evenly spread pretzel mixture on top. Bake crust for 6 minutes.

Copyright © 2026 Holly Doerr All Rights Reserved.